How to Bleed ATV Brakes: 7 Easy Steps
Sep 14 2026
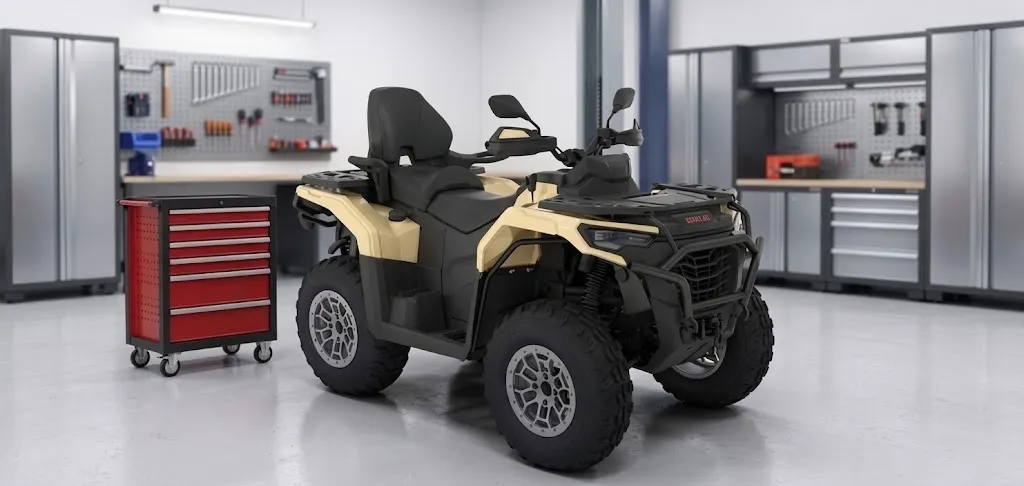
How to bleed ATV brakes is basic maintenance. It removes trapped air from the hydraulic brake system. It also lets you replace old or contaminated brake fluid. Air in the lines changes how the brake lever or pedal feels. Soft. Spongy. Gas compresses more easily than hydraulic fluid. Bleeding restores normal pressure transfer. This guide covers when to bleed, tools needed, manual and vacuum methods, and the safety check before riding.
1. When Should You Bleed ATV Brakes?
Check the brake lever. The pedal too. If either feels soft, bleeding may be needed. Same after any hydraulic service. Brake fluid pulls moisture from the air over time. That changes performance. Boiling point drops. Contaminated fluid, or fluid past the manual's replacement interval, needs replacing. Air in the system too. Then bleed it.
Soft or Spongy Lever/Pedal Feel: A soft lever. No clear firm point. Air may be inside the hydraulic system.
Longer Stopping Distance: Braking response changes. Performance drops. Could be hydraulic. Could be mechanical. Check the whole system before riding. Bleeding alone may not fix it.
Dark or Contaminated Brake Fluid: Fluid turns dark. Cloudy. Particles show up. It has broken down or gotten contaminated. Check it. Replace it per the owner's manual.
Recent Hydraulic System Service: Any opened or removed brake hose, caliper, master cylinder, or hydraulic part. Air can get in.
Suspected Brake Fluid Leak: Reservoir level keeps dropping. Check lines, fittings, Banjo bolts, and seals for visible leaks first. Bleeding will not fix a physical leak.
2. What Do You Need to Bleed ATV Brakes?
Get the right tools first. Correct brake fluid too. Before you open the hydraulic system. That keeps contamination out. Keeps the job organized. Clear tubing shows fluid clarity and bubbles. A catch bottle stops brake fluid from dripping onto paint or plastic. Check the owner's manual. Use the fluid spec your ATV requires.
What You Need | Why You Need It |
Correct Brake Fluid | Tops off the master cylinder reservoir. Meets your model's fluid spec. |
Clear Plastic Tubing | Fits over the caliper bleeder valve. Lets you see fluid clarity and air bubbles. |
Catch Bottle / Container | Collects used brake fluid safely. Keeps it off paint and plastic. |
Correct-Size Wrench | Fits the caliper bleeder valve nut tightly. Opens and closes the valve without damage. |
Jack and Jack Stands | Support the chassis safely when you remove a wheel or need caliper access. |
Nitrile Gloves & Eye Protection | Lower the risk of brake fluid contacting skin or eyes. |
Helper or Vacuum Bleeder Pump | Helps with manual lever pumping, or allows one-person fluid extraction. |
You can use the two-person manual bleed or a vacuum bleeder for solo work. The standard manual bleed has 7 steps.
3. How to Bleed ATV Brakes Manually: 7 Steps
1. Park and Secure the ATV
Park on flat, solid ground. Secure the ATV exactly as the owner's manual says. If you lift the vehicle or remove a wheel to reach the caliper, use a rated jack and jack stands. Follow safe lifting rules. Remove a wheel only when you need clear access to the bleeder valve.
2. Clean and Check the Fluid Reservoir
Wipe the top of the master cylinder reservoir clean before removing the cap. Keep the area free of dust and debris. That stops sand and dirt from entering the open hydraulic system. Top off with the brake fluid your model requires. Bring it to the correct level. Do not let dirt or debris get in.
3. Connect the Tube to the Correct Bleeder Valve
Put one end of the clear tubing over the caliper bleeder valve. Put the other end into a little clean brake fluid in the catch bottle. Keeping the tube end under liquid helps prevent air from being pulled back into the caliper. Hydraulic line layouts vary by ATV model. Be sure to review both your owner's and service manual prior to starting work on it, and check its bleed order and location; the SWM TRAILHUNTER 1000 uses dual brake discs with hydraulic dual-piston calipers in front and back; however, before commencing any new project make sure to confirm bleed points and procedures that fit with your specific model.
4. Pump and Hold the Brake to Build Pressure
Have your helper pump the brake lever or pedal several times. That builds system pressure. Then hold it firmly. Pressure helps push trapped gas toward the caliper bleed port. While the bleeder valve is open, your helper must keep the lever held down. No release during the bleed.
5. Open the Valve to Release Air, Then Close It
Open the bleeder valve just a little with a properly sized wrench. Used fluid and bubbles flow into the clear tube. The brake lever drops toward the handlebar. Your helper keeps steady pressure on it. Once flow slows, and before your helper releases the lever, tighten the bleeder valve again.
Core rule: Pump, Hold, Open, Close, Release. The bleeder valve stays closed and tight before your helper lets go of the brake lever or pedal. That stops air from rushing back into the line.
6. Repeat Until the Fluid Is Bubble-Free
Repeat the cycle: pump, hold, open the valve, close the valve, release the lever. Keep going until the brake fluid coming out no longer shows clear air bubbles. Complete the bleed as your model requires. Watch the master cylinder reservoir level the whole time. Top it off as needed. Never let the master cylinder reservoir run dry. If it does, air gets pulled back into the top of the line. That means more bleeding.
7.Refill,Reassemble,and Test
After bleeding, tighten the bleeder valve. Wipe up leftover fluid. Fill the master cylinder reservoir to the marked fill line. Put the rubber diaphragm and cap back on. Reinstall any wheel you removed. Lower the vehicle. Pump the brake lever several times. Check for a firm, consistent feel. Before normal riding, do a low-speed brake test in a safe, flat area. Confirm braking works properly.
4. How to Bleed ATV Brakes With a Vacuum Pump
When to Use a Vacuum Bleeder
A vacuum bleeder helps when you have no helper and need to bleed the brakes alone. It applies negative pressure at the caliper bleeder valve. The pump pulls old fluid and gas down and out of the line. Good for one-person maintenance.
How to Use a Vacuum Bleeder
Fill the master cylinder reservoir to the MAX line with fresh brake fluid.
Fit the vacuum pump hose connector tightly over the caliper bleeder valve.
Work the vacuum pump handle. Build negative pressure inside the collection canister.
Open the bleeder valve slightly. Draw old fluid and bubbles into the waste container.
Watch the master cylinder reservoir level. As it drops, add fresh brake fluid.
When the fluid coming out no longer has clear bubbles and flows steadily, tighten the bleeder valve. Then release the vacuum pump pressure.
5. How Do You Know the ATV Brakes Are Properly Bled?
A properly bled system gives the lever or pedal a firm, consistent feel. It should not sink or lose pressure when held. Check these signs before normal riding.
Firm and Consistent Resistance: The brake lever or pedal responds firmly and predictably. No soft or spongy feel.
The Lever or Pedal Does Not Slowly Sink: Steady pressure on the lever does not make it slowly sink toward the handlebar.
Stable Reservoir Level: The master cylinder reservoir level stays at the specified line. It does not drop for no reason.
No Visible Leaks: No brake fluid seepage or wetness around the bleeder valve, Banjo bolts, copper washers, rubber hoses, or caliper seals.
Consistent Low- Speed Stop: The vehicle gives a stable, predictable brake response.
6. Why Are My ATV Brakes Still Spongy After Bleeding?
Air Is Still Trapped in the System
If the bleed order does not match your model's spec, or if the master cylinder reservoir ran dry during the job, air may still be inside. Opening the bleeder valve before pressure is applied can pull air in. Releasing the lever before the valve is closed can do the same. Check the owner's manual again for the correct bleed order. Repeat the steps carefully.
There Is a Brake Fluid Leak
A leaking line fitting. A bad seal. Either one keeps the system from holding normal pressure. It can also let air into the hydraulic circuit. Check rubber brake hoses. Metal fittings. Banjo bolts. Copper washers. Bleeder valves. Calipers. The master cylinder. Look for leaks or oil film.
A Brake Component Needs Inspection
Brakes still spongy after a correct bleed. No external leak visible. A qualified technician may need to inspect the system. The cause may go beyond trapped air. Use ATV troubleshooting. Check other hydraulic or mechanical issues that affect brake performance.
7. How to Keep Your ATV Brakes Ready to Ride
Chec the master cylinder reservoir level regularly. Watch for color changes. Cloudiness too.
Check brake pad thickness. Check the brake disc surface. Heavy wear. Deep grooves. Damage.
After mud, water, or rough terrain, check exposed rubber brake lines and metal fittings. Look for wear. Wet spots. Damage.
Follow the brake fluid replacement and inspection intervals in your ATV owner's manual.
Before every ride, do a quick brake test. The lever or pedal should feel firm. It should respond normally.
A quick ATV inspection before each ride catches other common issues too. Before they affect your ride. A soft brake lever. A minor fluid seep. Knowing how to bleed ATV brakes helps you handle basic hydraulic maintenance with confidence. After the job, check and test the system as your model's manual says. Confirm the brakes work properly before normal riding.
-
Sep 14 2026
learn more
 How to Bleed ATV Brakes: 7 Easy Steps
How to Bleed ATV Brakes: 7 Easy Steps
How to Bleed ATV Brakes: 7 Easy Steps
-
Sep 10 2026
learn more
 How to Prepare Your ATV for Winter Storage
How to Prepare Your ATV for Winter Storage
How to Prepare Your ATV for Winter Storage
-
Sep 09 2026
learn more
 ATV Payload Capacity Guide: What You Need to Know
ATV Payload Capacity Guide: What You Need to Know
ATV Payload Capacity Guide: What You Need to Know
-
Sep 07 2026
learn more
 How Long Do ATV Batteries Last? 5 Crucial Factors & Lifespan Guide
How Long Do ATV Batteries Last? 5 Crucial Factors & Lifespan Guide
How Long Do ATV Batteries Last? 5 Crucial Factors & Lifespan Guide